Bottlecap Tutorial
IBAScrappin1 AKA Cheryl
2 Cut down on the length of this tutorial I have supplied some templates.
Get Them Here
While doing this tutorial it is a good idea to save your settings in the different effects, so when you goto make another one they are already there for you
If you need some ideas for caps check out this site http://www.bottlecaporama.com/
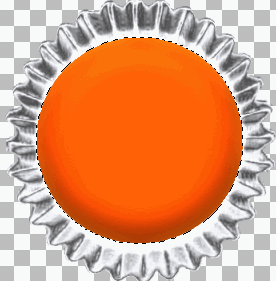
1 Use your magic wand to mask the template image(keep masked till told to unmask)
2.Goto Effects/3d Effects /Inner Bevel use these settings

Making The top of the cap
1 Create a new layer.
2. Using the paintbrush round shape, size 258 for tagger size cap, size 390 for scrap booking size
Paint your top color in the center of your cap base it should look something like this
1 Create a new layer.
2. Using the paintbrush round shape, size 258 for tagger size cap, size 390 for scrap booking size
Paint your top color in the center of your cap base it should look something like this

3. Use your magic wand on what you just painted (keep masked till told to unmask)
4. Goto Effects > Artistic Effects > colored edges and use these settings: the color you choose should be a lighter shade of the color you are using.
4. Goto Effects > Artistic Effects > colored edges and use these settings: the color you choose should be a lighter shade of the color you are using.

5. Goto Effects > 3D effects > Inner bevel and use these settings: For the color in this 1 go a little darker. Just play with it till u get the result you want. U will see the fifference in the right side of the box
You should have something like this but in your color

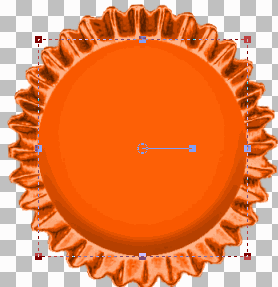
6 Use the Raster Deform tool to size your cap top so that it is how u want it. Unmask when finished.
In this sample I have made it a little longer to cover the white spot on the top and bottom

7. Now just decorate your cap to your liking.
Note : if you want color the bottom part simply use the dropper and get the color off the top and use the change to target brush tool on the bottom of your cap Then goto adjust /brightness darkness to get the look you want. And change to target brush tool 1 more time . And it will look something like this.

And after playing with it for a bit this is what I ended up with

Hope you enjoyed this tut and that it was helpful. Would love to see your creations from it so drop me a comment so I can see where u have it posted


4 comments:
This is outstanding! Thanks so much.
xoxo
Val
really nice tut!
thx
That turned out awesome. And great instructions.
Thank you.
Paulette
Cool TUT !! I did this and put them up on my blog if you would like to see, thank you so much :)
Post a Comment